
Gaanon
-
Posts
318 -
Joined
-
Last visited
-
Days Won
28
Content Type
Profiles
Forums
Gallery
Events
Everything posted by Gaanon
-
Will do. But they’re different from what’s in the Anovos kit. And yes, redoing that belt completely sucks with whatever epoxy they shove in there. Sent from my iPhone using Tapatalk
-
I was waiting on you to chime in, Dean. I do have one question regarding the shoulder straps. This is more informational than anything. I was given two sets, one textured and one smooth. I'll be using the accurate textured one. But what kit does the smooth one go to? I haven't gotten an answer on FISD for that one.
-
I know what you mean. I've got the ATA. The only thing I see missing from the ab is the split at the bottom of the smaller button plate mount. Minor detail, I'm sure, but still. The rest of this week will be shopping for other supplies I've used up between my ATA and my kid's WTF Biker. Honestly, if I dirty anything up, it's probably going to be my ATA. I'm hoping that with a pack on it will hide some of the wide cover strips I had to use in the back.
-
As promised, back at work and here we go! Everything laid out on our conference table at work. What else is a conference table good for? I was surprised at how much stuff there actually was. Took up the whole table. Now for the detailed images. Here we have the helmet, pre-trimmed ears, two types of shoulder straps (need to look up the different versions of this kit) and biceps. Chest, back plate, and forearms. Looks like a lot more room than what I currently have. Ab and cod, belts (something else to look up), different ab buttons, different hand plates, thermal det was pretty much preassembled, drop boxes (inner and outer). Leg day (I had to move around the other side of the table for a better look. TK knee plate and two TD knee plates, thigh ammo belt (AM will prebend them for you if you like) Some of the extras, correct brow and neck trim, aluminum mic tips, ABS weld (I'll stick to E6000, thank you) and some hardware. Detail on the belts and buttons Detail on the ab buttons and hand plate options. Ab and cod detail (I was happy this was one piece. I've heard some kits this comes in two parts and didn't want to deal with that.) Close up on the kidney and butt plate. Close up on the pre-trimmed ears, mic tips, and shoulder strap options. And that's about it for now. It also came with what looks like the correct lens material. Decal options for TK or TD as well as some frown mesh and tube stripes for stunt and hero. I will say this, packing was awesome. Everything wrapped almost individually and stacked neatly. Not tossed in with peanuts like I've seen before. I'm going to have a heck of a time getting it all back in the box. But all in all I'm quite pleased with the kit itself and the value. If I didn't have work today, I'd be at home beginning assembly. Brian
-
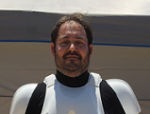
Yes, I’m building another TK. And hopefully I can document this build a bit better. Those that have seen my kit know I’m not happy with the sizing. Nothing against the kit maker, I didn’t do enough homework and it’s just not something I could size up and make look good with my skill level. So, originally I was looking at an RT-Mod kit but after his estimated delivery time passed by a few months and no response to email I reached out to Armor Masters. I understand Rob travels frequently, but I waited as long as I was willing to. Sunday night I sent in my payment and the BBB is already here! I was in complete shock. It’s been a busy day at work so I didn’t have time to do much more than take a quick look inside the box. Tomorrow I’ll crack everything open and take a complete photo. What I’ve noticed already: - There’s lots of extras. Multiple hand plates, ab buttons, knee plates - Mic tips are aluminum. Should pass basic, but they don’t look like my resin cast on the inside. I’m guessing they’ll need to be replaced for higher approval. - Even comes with helmet padding! - Plastic is thick. Seems even thicker than my ATA. - Ears are pre-trimmed and the eyes are already cut out. Overall it looks like there’s a lot of trimming already done. - Everything is smooth. No bumpy wonkyness that I’ve seen in other kits. My understanding is the AM molds are machined aluminum. I thought I’d like something smoother and more even...now I’m not so sure. This kit was super affordable. Let’s see what it takes to assemble it! Anyone with an AM, feel free to chime in with your thoughts. Sent from my iPhone using Tapatalk
-
Second try, and they sent me the right order. 15 minutes later (I took my time with it) and my sound board is working, complete with Jawa sounds! UTINI!!!
-
Slow going on my E-11. I’m in the process of painting it, finally, which shouldn’t be such a big deal except for the time between coats drying. Just tried some wrinkle paint on my Doopy kit. I got the idea off another build on FISD. Man I like this stuff! Three coats does the trick. Each one applied in a different direction. I got my can at Autozone. Sent from my iPhone using Tapatalk
- 1 reply
-
- 1
-

-
Correct. But that was for 10yds. Sent from my iPhone using Tapatalk
-
I think it’s the lighting. It does look darker in person. Here’s a dried pic I took. Sent from my iPhone using Tapatalk
-
Been doing a little bit of work here and there. Last two armor parties I rally got down to working on this. Mainly it’s been trimming and other prep work. This past week I took off from work and learned just how much I dislike sewing. But I got the soft parts done. “Dad, it’s hot and I can’t put my arms down.” Now you know how Dad feels in his armor. Just wait, we haven’t got the rest of the kit done yet. I’m waiting to attach the pouches until after I figure out if/how I’m going to fill them and after I get the chest and back set. I don’t want to mistakenly attach the pouches too high and have the chest cover them. So, I guess that’s my next move coming up. Fitting the chest and back. I know the fabric and everything may not be 100% correct. When she’s big enough for an adult kit, then we’ll get everything approvable. For now, Galactic Academy standards apply where needed. Sent from my iPhone using Tapatalk
-
Here we go. I’m dyeing here! Turns out the tub was closer to 25gal. Poured in all three bottles of dye, 3c salt, and let it work it’s magic. 20 minutes in and I was waiting on at least one of the three Fates to show up. You don’t know how long 30minutes is until you do this. And here we go all rinsed and hanging to dry. I’m at the laundromat now washing and drying. It’s been a while since I’ve been to one. Bring the change purse. You’ll need it! Wash is done. Now the dry. Sent from my iPhone using Tapatalk
-
Well, I learned something very important today gentlemen. It's not the cold, but the heat that causes shrinkage. Holy cow that fabric shrunk right up! And I think there was enough leftover cotton in the lint trap to spin into yarn and knit a new sweater! Next step dye. I've got 2 bottles dark brown and one tangerine Rit dye, 10 yards of cloth (before shrinking) and salt. My plan is to use about a 30gal container, fill with hot water, all three bottles and 3cups salt. Does that sound about right? Too much? Not enough?
-
Just restarted the wash on hot. That stitching on the ends did the trick! No fraying that I can see. I’ll do the after dye wash at the laundromat to keep the wife from killing me. And to keep my work clothes from changing colors! Sent from my iPad using Tapatalk
-
I’m doing this wash on cold. Oops. I’ll redo on hot. No big. My plan was to seal the cut ends to prevent it fraying in the wash. Then wash, dye, and cut to pattern. Sent from my iPhone using Tapatalk
-
Yes, the ATA (and most kits) are totally not symmetrical. The ATA is also bumpy as all heck, a feature I’m not so fond of. Also notice on the kidney plate that there’s no notch on the ends. Sent from my iPhone using Tapatalk
-
Fingers crossed. Let’s see how good I did at prep...I trimmed the edges of my monks cloth straight, sewed back a few rows to prevent fraying, and removed the extra strands. Now it’s in the wash. I was looking up monks cloth on YouTube and saw something on prepping it for some Swedish neddlecraft and figured the prep couldn’t hurt. Sent from my iPhone using Tapatalk
-

(EC) 2018-04-22, Sun, Armor/Sewing Party & Meeting
Gaanon replied to PunkRocketScience's topic in The Armory and Academy
I'll be there. Debating trying to dye my fabric this week or wait until the AP for it... -
I'm in. I've got some coworkers interested. I've sent them to Krayt Clan and our forums to register for access.
-
(NC) 2018-03-24, Sat, Armor Party / Meeting
Gaanon replied to PunkRocketScience's topic in The Armory and Academy
If you get overwhelmed, hit me up. I’m not too far from El Cajon. Happy to help out if I can. Besides, I’ll probably be working on my many projects this weekend also. Sent from my iPhone using Tapatalk -
(NC) 2018-03-24, Sat, Armor Party / Meeting
Gaanon replied to PunkRocketScience's topic in The Armory and Academy
I'll be there! Start the party now. -
(SD) 2018-02-25 Armor Party @ "Other" Todd Felton's
Gaanon replied to BrieKalan2's topic in The Armory and Academy
I’ll be there. Kiddie Biker and my Tusken mask. Plus fun stuff. Sent from my iPhone using Tapatalk -
My TK is ATA. I believe @DaygoErm has an MTK. The question you need to ask is how long do you want to wait for your kit? Both are definitely approvable. ATA you're looking at waiting over a year to get it. MTK you can get a lot faster and it's sourced locally, so you might even be able to pick it up and save the shipping. As long as you have the standard body type, I'd go with the MTK instead. Let me know if you're going to be at the Armor Build this Sunday and I'll bring my kit with me if you'd like to take a look. Brian
-
Exactly how I did mine. Took some sandpaper to the abs on my kit to help that side and works great. Sent from my iPhone using Tapatalk
-
I've got a full DD kit as well. Still in the build process. If you're short on time, I agree going the Hyperfirm route or another prebuilt version. Look over the E-11 build threads on FISD. Lots of info there and many recommended upgrades to the kit. Keep in mind the DD kit does not come with the scope rail or the counter bracket. You'll have to source/build those yourself. At least it didn't when I purchased mine.
-
Walt’s Trooper Factory. He does a lot of kid sized costumes. Sent from my iPhone using Tapatalk
